Hi everyone,
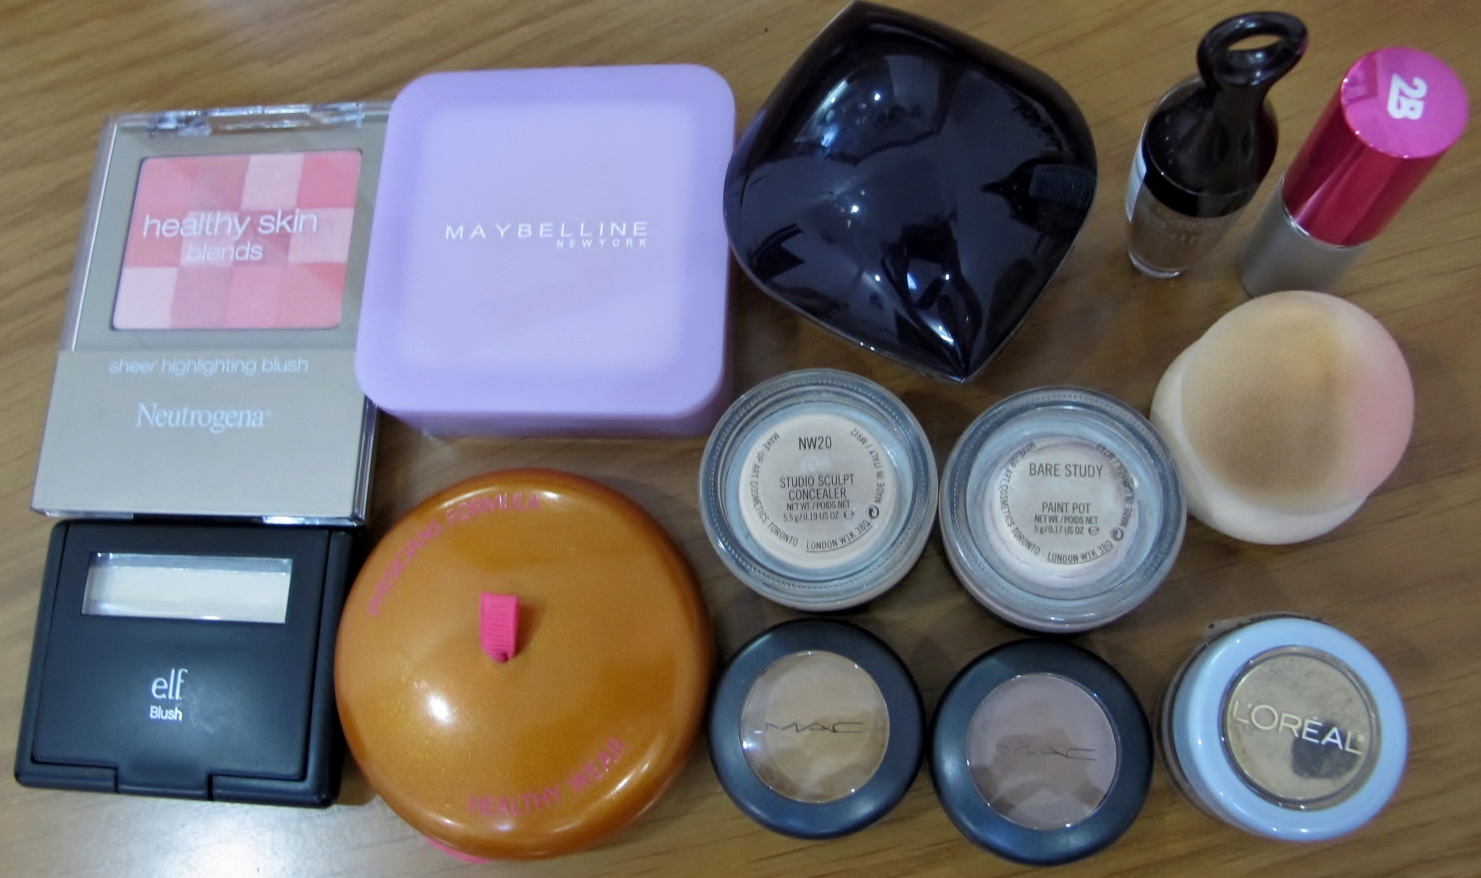
I've wanted to put rhinestones around my eyes since forever. Yet, every time I tried it, the rhinestones did not seem to stick. I gave up but the dream did not die. Last week, I went to the cosmetic shop near my house just to browse and saw some flat-back rhinestones used to decorate nails. I bought a small pack, went home and gleefully glued a couple of them on the area underneath my lower lash line. To my surprise, the rhinestones held up really well, which prompted me to do a look and bling up my eyes!
Here is the result:

The makeup is the same as I did here, except I changed the lip color from bright pink to nude. I have to credit my success to the new eyelash glue that I bought recently. The wand makes applying glue to the rhinestones feel like a dream. Before, I had to dip each teeny tiny rhinestone into a puddle of glue, resulted in oversoaked rhinestones that failed to stick to my skin.
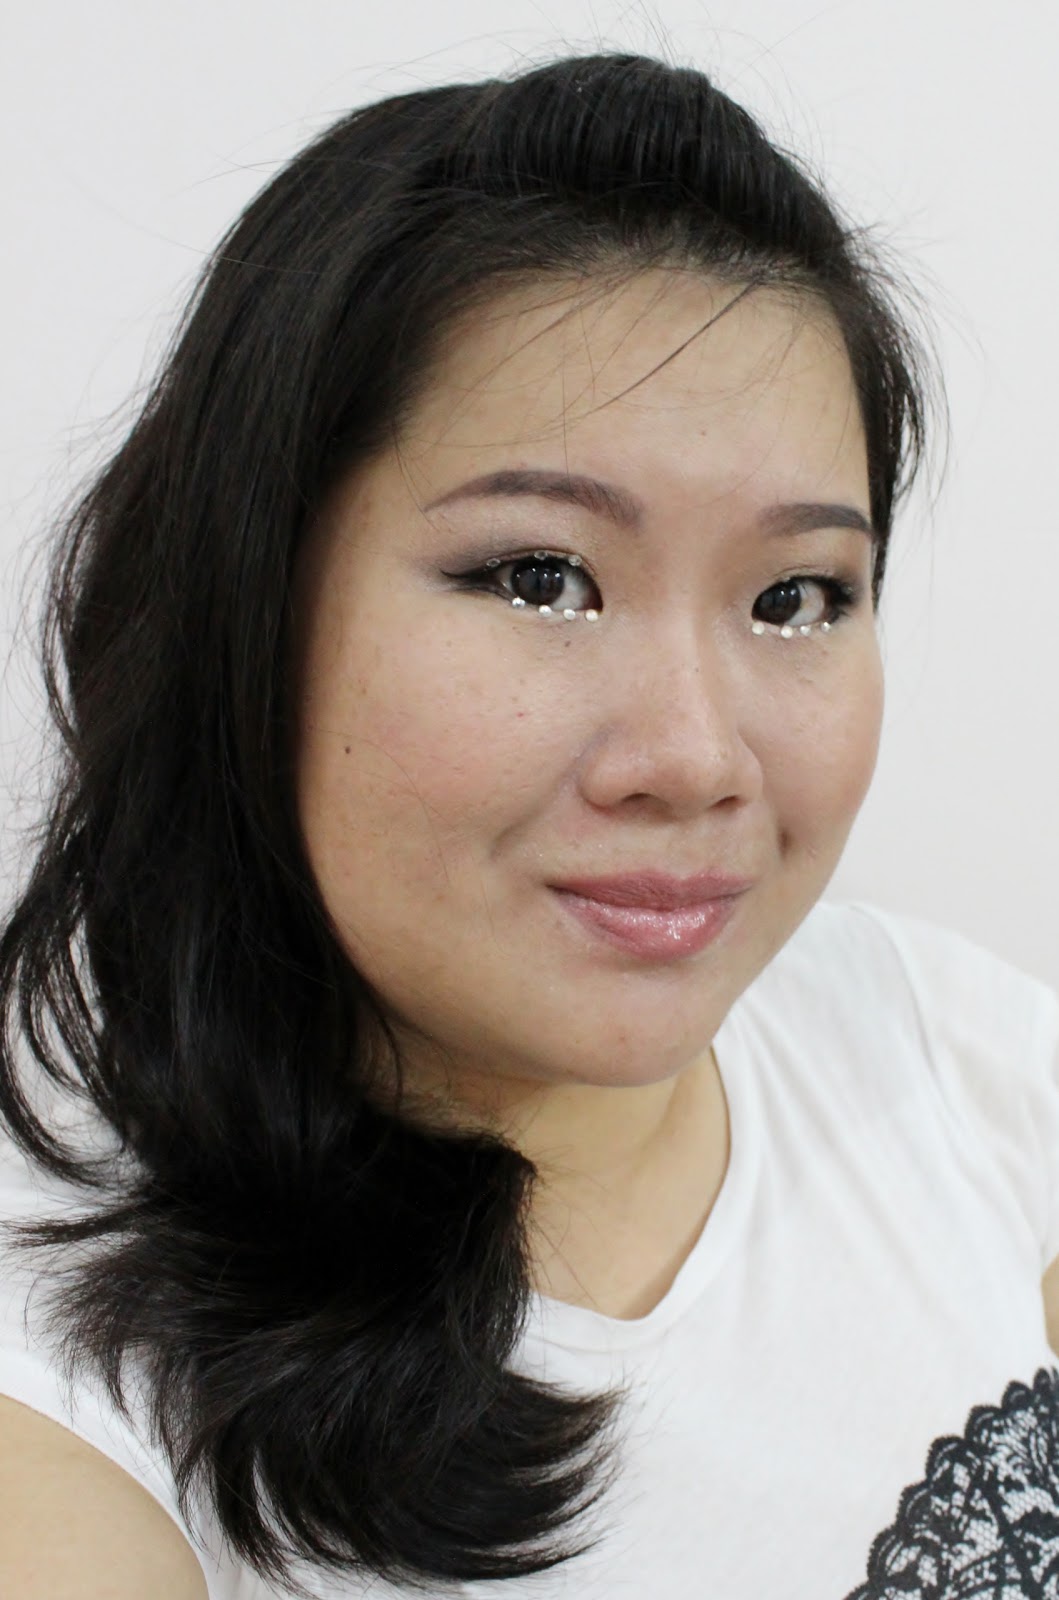
Without the rhinestones, it's a very wearable and polished day-time look. The rhinestones just add more pizzazz to the whole getup, I guess.
Now that I can glue stuff to my face, I am very happy.
With this new opportunity, I am going to incorporate more rhinestones to my makeup. A little bit of eyelash glue, a tweezer, and some rhinestones go a loooong way! Just make sure you are not allergic to the latex in your eyelash glue. If you do, just get a latex-free glue and it will solve your problem. (How to tell if you are allergic to latex: your skin will itch if you wear latex gloves or latex glue on your falsies!)
This is kind of a K-Pop look, don't you think? I love how clean and chic it is! While the rhinestones took forever to apply, it was all about the skin. I may do a how-to video on that in the near future. Just let me know if you want one.
With love,
Dao xoxo
P.S: Please show your support by following my blog and subscribing to my feed. Thanks a lot!
I've wanted to put rhinestones around my eyes since forever. Yet, every time I tried it, the rhinestones did not seem to stick. I gave up but the dream did not die. Last week, I went to the cosmetic shop near my house just to browse and saw some flat-back rhinestones used to decorate nails. I bought a small pack, went home and gleefully glued a couple of them on the area underneath my lower lash line. To my surprise, the rhinestones held up really well, which prompted me to do a look and bling up my eyes!
Here is the result:
The makeup is the same as I did here, except I changed the lip color from bright pink to nude. I have to credit my success to the new eyelash glue that I bought recently. The wand makes applying glue to the rhinestones feel like a dream. Before, I had to dip each teeny tiny rhinestone into a puddle of glue, resulted in oversoaked rhinestones that failed to stick to my skin.
 |
| Full-frontal look I was sweaty around the lips :P |
 |
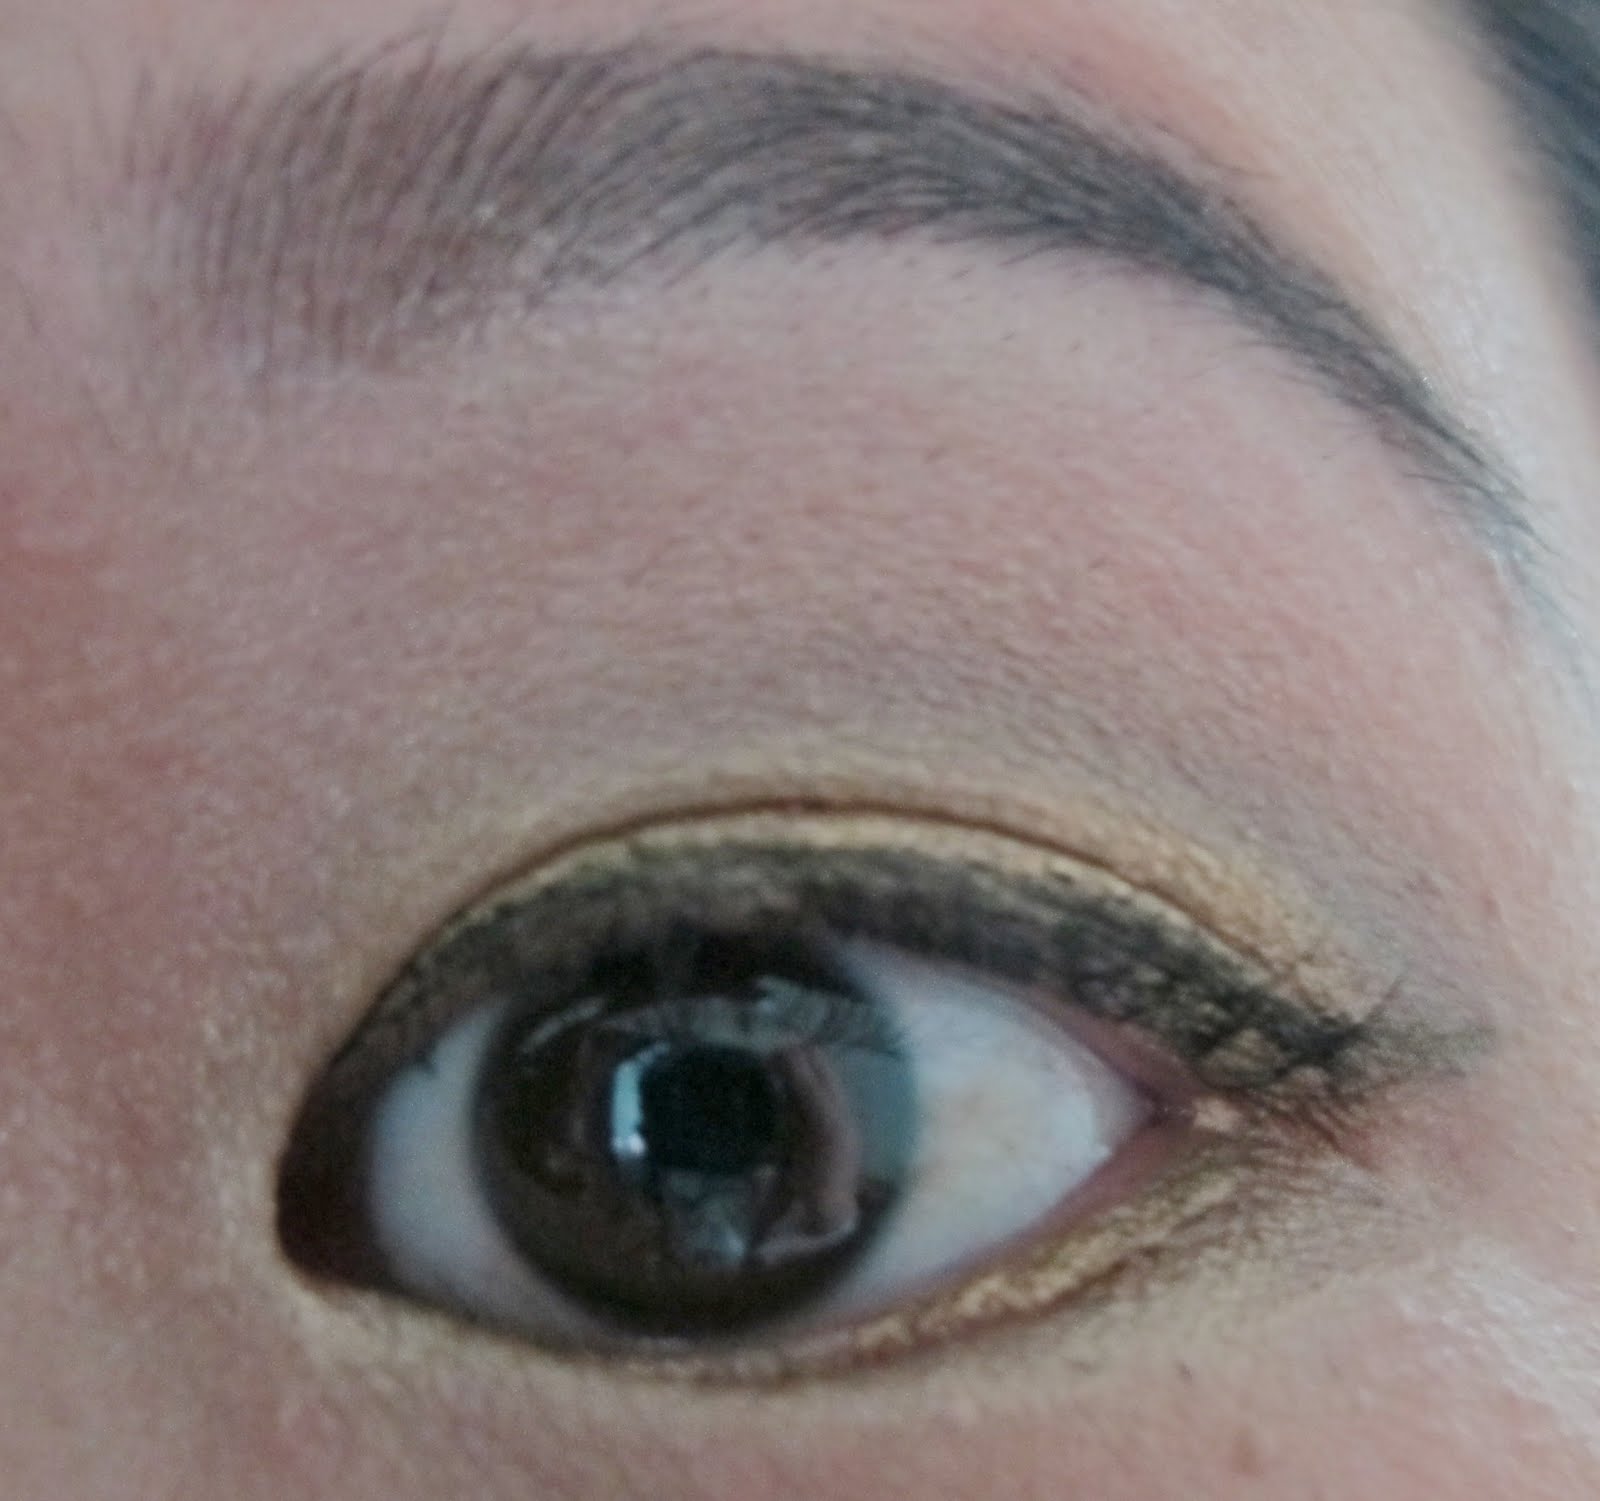
| Detailed look of the eye 3 rhinestones on top, 4 at the bottom Faux liner at the bottom to make it look like I have some bottom lashes :D |
Now that I can glue stuff to my face, I am very happy.
 |
| See? Happy! |
This is kind of a K-Pop look, don't you think? I love how clean and chic it is! While the rhinestones took forever to apply, it was all about the skin. I may do a how-to video on that in the near future. Just let me know if you want one.
With love,
Dao xoxo
P.S: Please show your support by following my blog and
subscribing to my feed. Thanks a lot!


.jpg)