Monday, August 24, 2009

MAC 168 Brush: Fabulous for Contouring

Hi everybody,

Just a quick post today as I have a ton of things to do on my list. Another school year just started and usually, I am extremely busy at the first week of school. If you recalled, I did a big haul before my birthday during MAC friend and family sale. While I reviewed most of the items, I still did not say anything about MAC 168 large angle contour brush yet.

You may say, "Jeez, girl! You really squeeze out everything from that haul, don't you?"

There's a yes and a no answer to this. First of all, all the products I ordered from MAC are really good and I just want to share my opinion with you. Secondly, I probably do not get to do such big hauls anymore so I am trying to get the best out of them.

My MAC 168 brush

About this brush: initially, I did not intent to buy it at all. Since I already have some (cheap) contouring brush, the idea of bringing in another one did not entertain me. However, I thought the sale was a good opportunity for me to get some high-quality brushes. So, I caved and bought this brush.

The MAC 168 is really really soft: it's like brushing your face with feathers. The softness is a stark contrast to my cheap brushes and I thought to myself, "This worth my money!" As a contouring brush, it does a better job in getting that sharp line than my budget brushes. The way this brush was cut makes it fit the contour of my cheeks perfectly. Also, it can be used as a blush brush.

However, like other white goat hair brushes, the MAC 168 is a bit difficult to clean. I used my hair shampoo to wash and the color came off quite nicely. I am glad this brush dries faster than the other ones, although it is quite a big brush.

Here are the pros and cons:
  • Pros: is really soft, gives nice contouring lines, dries fast, does not shed
  • Cons: is expensive, gets dirty quickly due to the white goat hair
Price: $32 at MAC counters and MAC website
My rating: A

I am glad to buy this brush as it does the job and is reliable. I highly suggest you to get this brush if you are into contouring. I know there are many budget contouring brushes out there but if you are looking for a reliable brush to use for a long time, please save your pretty pennies and pick up the MAC 168 brush.

That's all for Monday, I hope you'll have a wonderful week ahead!

Photobucket

P.S: If you like my blog, please subscribe to my feed. Thanks a lot!

Sunday, August 23, 2009

Sunday Beauty Reads

Hi everybody,

It's Sunday again and I'm glad to bring you a list of reviews and a giveaway that my beauty bloggers and I assembled together during the week. I hope you'll enjoy them.

Beauty Anonymous reviews La Mer The Treatment Powder Foundation SPF15.

Alison of the Advice Sisters has discovered Fragrant Waters by Bath & Bodyworks cool rollerballs and regular flacons that will surpise and delight you!


Face Candy interviews purse designer Katherine Kwei about her beauty routine. Plus, WIN A $920 Katherine Kwei purse!

Fabulous Over Forty has a week long review of the Fall 2009 Beauty out in stores now.

The Ultimate Treatment for Your Visage right in this beautiful little bottle.


Sicka Than Average courtsies and bows down to the Essie Loves Diamonds by Judith Ripka collection. Give your fingernails a regal touch!


Dao at My Makeup Blog found a way to create marvelous curls without using heat.


Photobucket

P.S: If you like my blog, please subscribe to my feed. Thanks a lot!

Friday, August 21, 2009

Everybody's Favorite Hair Bow

Hi everybody,

Today is the last day of Hair Week and I hope to end it with a bang. Ever since Lady Gaga came to the music scene, the world has taken in her fashion and hairstyle like a breath of fresh air. As much as I try to update myself, sometimes I feel like living under a rock! Recently, I found a sleuth of hair how-tos on YouTube that shows me how to make everybody's famous hair bow.

Yes, I'm talking about this, people!
Image courtesy The Fashion Cult

This hair bow has been so popular that now a lot of famous ladies have seen sporting it

And if you notice closely, the first two pictures on the second row came from fashion shows!
Image courtesy Fashion Daily Mag

Granted, Lady Gaga's hair bow probably was made from synthetic (or maybe even human hair) and tied to her head with a pin. If you go on eBay, you can find a hair bow that matches your hair color. However, a ton of YouTube gurus made tutorials to make the hair bow with their own hair. Seriously, they are like hair wizards and most videos out there are complicated for me.

Then Cheesie (again) showed me how to do the Lady Gaga hair bow in some really simple and easy steps:


Since my hair is not long enough to make a bow on top of my head, I opted for an updo bow :) This is the result after the first try:

I softened up the picture a bit

And in this picture, I sharpened up the details

If you follow the tutorial closely, this hair bow is not so difficult to do. I just wish to have another 4 inches of hair so it can look better. Also, my hair tend to work better when it's a bit dirty. When it's so clean, it can't hold up properly.

What do you think? I hope you enjoy Hair Week so far. I'm glad to get it out of my system so I can move on with my makeup. For me, this is a lot of improvement from my early days at this blog. At that time, I could barely blow dry my hair!

Take care, everybody! And have a nice weekend!

Photobucket

P.S: If you like my blog, please subscribe to my feed. Thanks a lot!

Thursday, August 20, 2009

My Messy Updo

Hi everybody,

Today is double-posting day, I hope you enjoy the earlier post so far. In 2004, I managed to do the only thing I wanted to do: I chopped off my hair into a bob! It was a refreshing experience to me as I had long hair for a while. However, before the hair transformation, I managed to score some really hot hair accessories. The leather rose hair tie was one of them. At that time, I was so sure to never grow my hair longer again that I discarded most of the hair pretties. However, the stingier part of me told me to keep some pretty stuff just in case.

Little did I know that around 2007, I started growing my hair out again. This time around, I managed to let it grow, then cringed when around 4 inches of my hair got lopped off twice! Once was a mistake, and twice was to correct that mistake. If those incidence did not happen, my hair would be around my waist by now.

The one thing I look forward to the most when growing my hair out is to get an updo. Usually, this is an activity that challenges me to the very end because (a) my hair is really straight and (b) updos usually fall down very fast when I do it on myself. But the marvel of blogging and YouTube brought me the easiest updo ever!

Cheesie's Japanese Hair Bun


I've read her blog circa 2004 and love her style. This is really easy to do but... my hair is not long enough. My updo ended up looking messier but nevertheless, it's still lovely.

I did it lower than Cheesie's, then added some pretty hair accessories around it


The closeup of my hair twists

These hair twists survived the short hair wave since 2004. I still can't believe I keep them! And I was more surprised to find them looking the same as when I bought them in Texas. They were my vacation souvenirs and they really look gorgeous!

Another shot at the hair
You said blurry, I said artsy :)

Now, the side :)

And the front
I was sick but managed to look dignified :p

Granted, my hair needs to be a bit longer for me to do some really neat stuff with it. I can't believe how much longer it has grown since last year! And that's the one wonderful thing about hair: it can always grow back.

That's all for today, folks! Tomorrow is going to be the last day of Hair Week. Are you enjoying it so far?

Photobucket

P.S: If you like my blog, please subscribe to my feed. Thanks a lot!

Curling Straight Hair with Sponge Rollers: Retro Fabulous Way to Style Your Hair

Hi there, my lovelies,

"Curling straight hair with sponge rollers? Really?" you may ask.

Yes, baby! I know it's retro. I know your grandma used it, I know Scarlett O'Hara would have used it if it was available during her time. These sponge rollers, retro or no, are great! I have stick straight hair that does not just curl without using some kind of heat styling device (for example, a flat iron.) On top of that, when it comes to styling my own hair, I have two left hands. So, the less I expose myself to heat styling devices, the less harm I inflict on myself (and my hair.)

In the past, I used the velcro rollers when my hair was shorter and while they provide bounciness and volume, they do not give luscious, drool worthy magazine cover curls. At that time, I tried the sponge rollers but I did not know how to roll my hair. Shocking, isn't it? Well, that does not happen anymore and today I am going to tell you how to get luscious curls like this. It's really easy and the result lasts for some days if you take care of it properly.

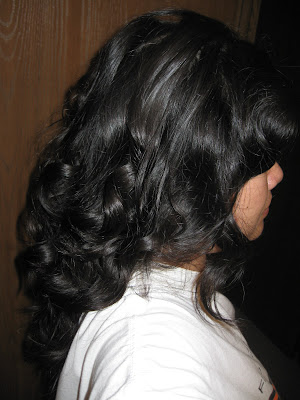
My hair after being sponge curled, with flash
Look how shiny it is!

First of all, you need some sponge rollers (or foam rollers, depending on where you live.) These are easy to find and affordable as well. Goody makes some really good ones for 3 dollars a set, or around 10 dollars for a big kahuna with a lot of different sizes. Yours truly got hers at Dollar Store.

My foam rollers

I got two sets: the black rollers are the smallest available at the store while the pink ones are the standard rollers you can find everywhere. The smaller the diameter of your rollers is, the tighter the curls will be.

You'll also need some mousse and hairspray. I used Aveda Phomollient styling foam and Herbal Essences hairspray. They work fine and do not make my hair stiff and sticky. Then, I section my hair into 4 parts: the bang, the sides, and the back. I use the smaller rollers at the top layer of my hair and the bigger ones at the bottom layer because I need more defined curls on top.

Secondly, instead of rolling my hair from tip to roots, which is really difficult to do with my straight hair, I hold the roller at the middle and wind the bottom half of my hair around the roller. Then, I roll the remaining hair toward my scalp. Usually, I start rolling from the left section, then the right section, and the back. Since my bang is getting really long, I roll it with the pink sponge roller. Otherwise, I just leave my bang as is.

After my hair is all rolled up, I usually either (a) watch some couple episodes of CSI or (b) clean my bathroom and the rest of my pad. The longer I leave the hair in the rollers, the tighter the curls will get. However, if you don't have time, 15 minutes with the rollers can give you loose and wavy curls. (Back in the days, people actually slept with their sponge rollers on. It's not really comfortable but hey, people still live for their vanity, don't they?)

When it's time to take my rollers off, I carefully unwind them without ripping them off. That way, I still have decent curls (and decent hair that's still attached to my scalp!) Then, I flip my hair over, spray copious amount of hairspray without inhaling it, count to 10, and flip my hair back. For the sake of vanity and gravity, I manage to spray some more hairspray on top.

And the hair ends up looking like this:

Can you say "curls and volume"?

And that's me (with a cold and without makeup)
This is the only decent head shot I got during that week

Now, to care for the curls:

The sad part is regardless how much hairspray you smother yourself, eventually gravity will take over and pull your curls down. I actually like my curls to drop down a bit but love them to stay that way as long as I can. So, I became really discipline when it comes to curl maintenance:

1. Don't touch your hair: not only you'll mess up the curls, the oil in your hands interacts with the hairspray and may dissolve it as well.

2. Don't brush your hair with a hair brush or a comb: just finger comb your hair slightly and that's it! Brushing your hair detangles the curls and brings frizzes to them as well.

3. Sleep with a bun on top of your head: yeah, you heard me, sisters! At night, I tie my hair into a loose bun and just sleep like that. In the morning, I take it down and not only the curls retain, I get more volume as well.

And that's all it takes to get curly hair, from a stick straight haired girl's perspective. The morale of this story is: the grass is always greener on the other side but have fun while you can.

Alright, we're having a double posting day. Please stay tune for the second post where I show you the result of my effort to make an updo.

Photobucket

P.S: If you like my blog, please subscribe to my feed. Thanks a lot!

Wednesday, August 19, 2009

Herbal Essences Tousle Me Softly Hairstyling Products: Hair Fabulous!

Hi everyone,

Dao’s here with the second part of the Herbal Essences Tousle Me Softly review. This time around, we are going to explore four new styling products that make messy hair look so wonderful. Now, if you recall, I am a fan of the wavy, tousle hair. I even found a way to cheat on this look (click here.) So, I was really happy to test out these products and see if they live up to the claim.

Tousle Me Softly styling products

First stop: Tousle Me Softly mousse


Since I am just a wash and wear kinda girl, playing with this mousse and the rest of the other products is like sailing to uncharted water. The mousse is really easy to use: I just squirted a golf-ball size of product in my balm, rub my hands together gleefully, and the spread the stuff all over my hair from roots to tips. Then, I proceeded to blow-drying my hair. The result: va-va-va-voom, my love! My hair had more volume than I have ever seen!

Here are the pros and cons:
  • Pros: easy to use, not sticky, gives my hair a ton of volume, smells really good
  • Cons: nothing I can think of
Ingredients: water, isobutene, polyquaternium-4, propane, propylene glycol, C9-11 pareth-8, fragrance, DMDM hydantoin, disodium EDTA, citric acid.
Note: this product contains isobutene, which is a flammable chemical
Price: $2.99 USD at drugstores and mass-market stores
My rating: A+

Second stop: Tousle Me Softly spray gel


After the glorious result with the mousse, I moved on with the spray gel which has more holding power than the mousse. After washing my hair, I just spray the gel all over my head and then combed through before blow-drying. The result is less voluminous than with the mousse but my hair did have more volume than without using any styling products.

Here are the pros and cons:
  • Pros: very easy to use, not sticky, provides some volume, and of course, smells good
  • Cons: contains methylparaben
Ingredients: water, PVP, chitosan, lactic acid, PEG-40 hydrogenated castor oil, polysorbate 20, phenoxylethanol, fragrance, methylparaben, PEG-60 almond glycerides, polysorbate 80, disodium EDTA, etylhexylglycerin, tocopherol.
Price: also $2.99 and can be found at drugstores and mass-market stores.
My rating: A-


Third Stop: Tousle Me Softly finishing touch cream


This product is kind of like Hannah Montana: it is “the best of both world” product that can be used on damped or dry hair. I was happy to try it as this finishing touch cream has the potential to replace a whole army of styling products. At first, I spread a dime size amount of cream all over my towel-dried hair before blow-drying. Of all the products in this line, the cream is the only thing that managed to bring some messiness out of my really straight hair. Then, I used it as a styling cream and called it a day.

The result was quite sub-par: the cream, while is not sticky, is way too creamy for my hair. The next day, my hair became stringy and matted as if I did not wash it the day before. The holding power is weak, as well. I guess those who have dry hair may benefit from it.

Here are the pros and cons:
  • Pros: contains a lot of products, can be used on damped or dry hair, smells good
  • Cons: contains dimethicone which gave me huge pimples on my cheeks, is too moisturizing for my hair, has weak holding power
Ingredients: water, dimethicone, sorbitol, aminomethyl propanol, carbomer, VA/crotonates copolymer, fragrance, benzyl alcohol, PEG-40 hydrogenated castor oil, DMDM hydantoin.
Price: $5.49 at drugstores and mass-market stores
My rating: B-/C

Last stop: Tousle Me Softly hairspray


I love this hairspray: it is flexible, easy to use, and smells really good! In fact, if Herbal Essences decide to bottle up this scent and sell, I’ll definitely buy. With this hairspray, I am not afraid of stiff helmet hair. I purposely dowsed myself with copious amount of hairspray to see if and when my hair would get stiff. It did not happen, hallelujah!

Here are the pros and cons:
  • Pros: smell really good, is not stiff or sticky, makes my hair look shiny
  • Cons: nothing I can think of
Ingredients: alcohol denat, water, acrylates copolymer, ammomethyl propanol, fragrance, triethyl citrate, PEG-12 dimethicone, panthenol
Note: this product contains denatured alcohol, which is a flammable ingredient.
Price: $2.99 at drugstores and mass-market stores
My rating: A+

Of the four styling products, I guess the ones I would stick to are the mousse and hairspray. If you have fine hair or need a lot of volume, the mousse is perfect for you. If you want a basic styling product and do not need as much volume, the spray get is a good match. Finally, if you have dry hair and does not need a lot of holding power, the styling cream is a better option for your hair.

Yesterday, I had the most horrible allergy ever! So half of the time, I fought myself just to stay up and I'm sorry to miss blogging. So, tomorrow we may have double posts about hairstyles. I've been on a hair roll (literally and figuratively) lately and can't wait to share my tips with you!


Photobucket

P.S: If you like my blog, please subscribe to my feed. Thanks a lot!

Monday, August 17, 2009

Hair Week and Herbal Essences Tousle Me Softly, Part 1

Hi everybody,

Since I started blogging here, once in a while, I wan to have a week dedicated to a certain topic. Yes, we did start with a bang called “Seven Days and Seven Nights of Mineral Makeup”, aka Mineral Week. Then, we did have a so-called “Lip Week” that did not make as big of a stir. But I did not let that to annihilate me- well, maybe a bit of a delay, yes- and today, I gather enough resource to declare another special topic week: Hair Week! Let the fun begin, shall we?

Recently, I got an opportunity to try some new products from Herbal Essences’ new line called “Tousle Me Softly”. They provided me enough products to keep me busy for two weeks just to have a once go-around. Since Tousle Me Softly consists of six products- a shampoo, a conditioner, and 4 hairstyling products- I am going to split into two reviews. This one is about the basic cleaning and prepping products: the shampoo and conditioner.

The Herbal Essences Tousle Me Softly family

Off the bat, I really like the new designs on Herbal Essences products. The color purple of the Tousle Me Softly line is really pretty while the design is hip and chic. The fragrance of this line is violet, which is not too strong or too obnoxious. Back in the day, I mean the early 2000s, all Herbal Essences products smelled the same: strong flowery and quite old lady-ish. I remember the shampoo and conditioner to be really moisturizing and they left my hair looking glossy and long. However, I could not stand the smell. If you had ever used the old Herbal Essences shampoos, you immediately recognize it from other people who used it. It’s very recognizable! So it is refreshing to see each Herbal Essences line to smell different from each other now.

(Top-bottom): Herbal Essences Tousle Me Softly shampoo and conditioner

Herbal Essences Tousle Me Softly Shampoo is quite an interesting product: it suds well and feels like an expensive high-end shampoo. However, the luxurious feeling just ends there. It managed to dry out my oily hair under the Southern sun (and humidity) after only one wash! Now, it’s not something I have never experienced in my life. However, it’s something I have never felt while living here in summer. The constant heat and humidity makes my hair oily and sticky to the max.


Ingredients: water, sodium laureth sulfate, sodium lauryl sulfate, cocamidopropyl betaine, sodium chloride, viola odorata flower/leaf extract, punica granatum extract, fragrance, cocamide MEA, sodium benzoate, citric acid, sodium citrate, tetrasodium EDTA, guar hydroxypropyltrimonium chloride, linoleamidopropyl PG-dimonium chloride phosphate, methylchloroisothiazolinone, methyliosthiazolinone, sodium xylenesulfonate, blue 1, red 33.
Here are the pros and cons:
  • Pros: affordable, smells good, contains violet flower/leaf extract and pomegranate extract, does not contain parabens.
  • Cons: is drying (so it’s not suitable for those with dry hair), contains SLS and synthetic fragrance.
Cost: $2.99 USD at major drugstores and mass-market stores

My rating: B, can be A if it’s more moisturizing.

On the other hand, the Herbal Essences Tousle Me Softly Conditioner is a true luxury: it smells expensive, it feels expensive, and it makes my hair look shiny. All for a bit under 3 bucks! This purple conditioner is thick and highly moisturizing. However, the shampoo stripped off more moisture than the conditioner can replenish. Overall, I love this conditioner very much and it may have a future of being my stand-in conditioner after I finish my beloved conditioner.
Ingredients: water, stearyl alcohol, cetyl alcohol, stearamidoproyl dimethylamine, Viola odorata flower/leaf extract, Punica granatum extract, glutamic acid, fragrance, bis-aminopropyl dimethicone, benzyl alcohol, EDTA, sodium chloride, methylchloroisothiazolinone, methylisothiazolinone, citric acid, blue 1, red 33.
  • Pros: affordable, smells good, is moisturizing, contains violet and pomegranate extract, does not contain parabens.
  • Cons: beside containing synthetic fragrance, there's nothing I could think of.
Cost: $2.99 USD at major drugstores and mass-market stores
My rating: A+

A little bit about life itself...

Last week, I took a whole week off from blogging to heal myself. It's not cool being sick and not able to talk for almost a whole week. Half of the time, I sounded a lot like a cross between Bill Clinton and Donald Duck. The other half of the time, I tried to stay awake. NyQuil is miracle, without it I could not sleep, and as a result, felt like a maniac during the daytime!

The other side effect of being sick is laziness. I thought to have a lot of time to figure out how to do lots of things. Instead, I just slept like a baby! Right now, I sound a lot like myself but the cough is vicious. Yesterday, I woke myself up by coughing! Anyways, my cough can scare off some crooks during the PM :)

I hope you enjoy this first post of Hair Week. The second part of the Tousle Me Softly review is coming up tomorrow. Then, we'll have some posts on really simple hairstyles. Have fun, ladies!


Photobucket

P.S: If you like my blog, please subscribe to my feed. Thanks a lot!

Sunday, August 9, 2009

Sunday Beauty Reads

Hi everybody,

It's Sunday again and I really want it to have 48 hours instead of 24! Today, I have this strange feeling that I am slowly getting sick. For the past few days, my voice sounded more and more like Donald Duck each and every day. So please don't be surprise if I take some days off next week.

This week's gathering of the baddest beauty articles is right below. Please enjoy them and support my fellow beauty bloggers. They are really awesome!

Monique at Beauty Girl Musings reviews the new L'Oreal HiP Matte Shadow Duos!

Dao from My Makeup Blog discovered the awesome MAC 217 brush and loves it!

The Advice Sisters has found a great online web site for adding a bit of bling at bargain prices It is King Ice!.

Beauty Anonymous brings you Dolce & Gabbana The Make Up fall 2009 The Romantic Collection.

Check out Lipgloss Break's Review of Urban Decay's Pocket Rocket & Enter to Win One for Yourself!

Face Candy compares L'Oreal's Voluminous Naturale Mascara and L'Oreal's Waterproof Voluminous Mascara.

Butterflydiary loves her Jamba Juice, and gets a hint of it with Clinique Vitamin C lip smoothie in Nude-tricious.

Photographer and makeup artist Ellis Faas launched her self-named cosmetics line in Europe earlier this year. She is on the cusp of something new and different in cosmetics. Julie at More Than a Pretty Face interviews Ellis Faas about her cosmetics line and her work.


Photobucket

P.S: If you like my blog, please subscribe to my feed. Thanks a lot!

Friday, August 7, 2009

Beauty Literotica: YOU: Being Beautiful by Drs. Michael Roizen and Mehmet Oz

Hello everybody!

Do you watch “Oprah”? If you do watch “Oprah”, by now, you already recognize one of the authors’ names, right? Yes, I’m talking about Dr. Oz, Oprah’s favorite doctor who is soon to have his own talk show. To me, I tuned in whenever Dr. Oz appeared on “Oprah”. He has a simple way to explain diseases and symptoms so everybody can understand without reading the New England Journal of Medicine (which, by the way, is one of the most prestigious medical journal.) So, I was thrilled to pick up “YOU: Being Beautiful” because I thought I may pick up some makeup tips from these very influential doctors.

"YOU: Being Beautiful" by Drs. Roizen and Oz
Cover picture courtesy Cover Browser

Silly me for thinking that way! Instead of being disappointed, I went for (probably) one of the most hilarious joyrides ever caused by reading the book. If you have ever read “YOU: The Owner’s Manual”, the first book of the series, you will soon realize this book follows the same format. The two doctors give you straight talks and humors on various topics ranging from skin, hair, and nails to sex, love, and happiness. Sounds good, right?

“YOU: Being Beautiful” is divided into three parts with a quiz to measure your “YOU-Q” at the beginning. The quiz is a tool to gauge your perception on your own inner and outer beauty. Then, with the results in mind, the book helps you to navigate to the aspects you need to improve.


The three parts are “Looking Beautiful”, “Feeling Beautiful”, and “Being Beautiful”. Part 1 covers topics on skin, hair, mouth and teeth, hands and feet, and the shape of your body. While it has some anatomy vocabulary, this part as well as the rest of the book has some really interesting (and sometimes, funny) illustrations. Again, please do not expect any makeup tips here. This is a strict (and funny, and excellent) health reference book.

The illustration on skin exfoliation :)

Part 2 talks about ways to energize and revitalize your body, manage aches and pains, maintain your mood, and balance your job and money issues. This is probably the most serious chapter in this book and it took me much longer to go through than the other chapters. Drs. Roizen and Oz wrote this chapter with a lot of good and direct information.

Part 3 is the shortest section of this book and covers two main aspects: relationships and happiness. I have to give it to them for delivering the information with good clean humor. When talking about sex, even in the most clinical way, it is very hard to walk a straight line between information and pornography. Yet, they managed! (For a good illustration of the anatomy of sex, please turn to page 295. I decided not to take a picture of this illustration for the sake of the young-uns!)

At the end of this book, there are two workouts and other information on vitamin deficiencies and various plastic surgery procedures (for those who may consider them.) Overall, “YOU: Being Beautiful” is a great reference book worth keeping in your bookshelf. It may seem like a strange choice of book review for a makeup blog but I believe in beauty from within. No matter how much makeup you apply on the outside can mask your unhappiness inside yourself. Also, it does not hurt to know more about your body and how it works. I highly recommend you to check it out when you go to your local library or bookstore.

Photobucket

P.S: If you like my blog, please subscribe to my feed. Thanks a lot!

Thursday, August 6, 2009

Radiance FOTD

Hi everybody,

Remember the hair post I did last week when y'all liked my leather flower so much? Turns out the flower was not the only thing I love in that post. The makeup itself was so pretty and so simple that I have to talk about it.

After expressing my unequivocal love to Rubenesque paint pot (and I guess only makeup addicts can make such claims!), I decided to play around with my new acquisition and MAC Amber Lights (my crack on rye bread.) And guess what? The peachy-pink from Rubenesque plays really well with the golden-peach Amber Lights. I then used a MAC 217 to blend Amber Lights and Warming Trend on my crease, and highlighted with EDM Wet Sand blush (yes, it's a blush, I'm not kidding you!)

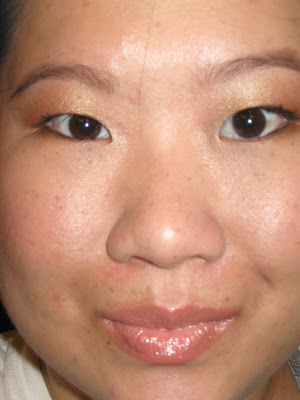
And I ended up looking like this:

Pretty, ya?

Close up at the eye

Semi-close eye

Another shot at my face

The key to this look is blending: without it, this look would not look as complex as it is. The fact that I only use 2 eye shadows on the lid and crease and manage to look rich probably is the testimony to the prowess of MAC 217. I would not get this look otherwise, serious!

Other stuff I used:
  • Adorned with Grace mineral foundation in Grace 3.5 and EDM Sunlight kaolin clay as a primer;
  • AwG test blush #3 applied with AwG Ingenue sleek dual fiber brush;
  • MAC fluidline in Flashtrack applied with Loew-Cornell spot detailer brush;
  • L'Oreal Extra-Volume Collagen mascara;
  • L'Oreal HiP Color Presso in Swanky.
That's all, folks! I guess I finally found my favorite makeup look for summer and this is it: I love the simplicity and glow of this look. What do you think?

Photobucket

P.S: If you like my blog, please subscribe to my feed. Thanks a lot!

Wednesday, August 5, 2009

New Product: Retro-Chic Conditioning Potion

Hi everybody,

Recently, I got an opportunity to try Retro-Chic Conditioning Potion from BeautyChoice.com. While I expected a couple of samples to play with, Beauty Choice sent me a full size bottle of conditioner, which was a delight and pressure to me. My hair is really really straight and while most conditioners do a decent job to keep it smooth, they do not go any further than that. I find about 9 out of 10 conditioners out there to over-moisturize my hair and leave it oily and clumpy the day after. It is sometimes antagonizing when I only need my conditioner to keep my hair tangle free and healthy, not greasy and stringy looking.


While I was thrilled to have something new to play with, I was also skeptical at how good Retro-Chic conditioner would perform. After all, this conditioner was made for people with colored hair and my hair is au naturale. (I haven't colored my hair for 3 years and saved a ton of money on hair dyes and deep conditioners.) The future of reviewing something that's not for me gloom before my very eyes and I was nervous. But I did not find any other scapegoats testers within one-mile radius so I decided to take a risk and kept in mind to be fair when I wrote this review.

After washing my hair with Dove shampoo (my regular), I squeezed about a quarter size of Retro-Chic conditioning potion and applied it all over my hair. Then, I covered my hair with plastic cap and went on washing other parts of my body. Finally, I rinsed off the conditioner and prayed to God something good might come out of this!

The result: quite positive, actually! It turned out my hair was really dry from using a different shampoo than my regular Dove and was in dire need of extra moisture. So it drank in the Retro-Chic conditioning potion with glee. After blow drying, my hair was shiner than it already is and has some extra bounce in it. The last one is something I did not expect.

Another positive thing about the Retro-Chic conditioning potion is the ability to resist moisture. Usually, most deep conditioners attract moisture like madness and leave my hair looking like a greased pan after the second day. Living in the South makes finding hair conditioners an Olympic sports and I am glad the Retro-Chic is not a moisture magnet.


Here are the pros and cons:

  • Pros: is sulfate free, so those who dye their hair are not afraid of stripping off hair color; does not have a strong smell; has an uplifting citrus scent (reminds me of Citre-Shine); detangles hair and gives a bit of volume; resists moisture (good for wavy hair).
  • Cons: pricey ($16 per bottle); has parabens and other ingredients that potentially can aggravate your skin.
Beauty Choice's website has something about this conditioner to use antioxidants and vitamins to protect and beautify the hair. Honestly, I don't believe in that as (a) the hair consists of dead, cornified cells that consists of keratin and melanin, (b) most molecules do not penetrate the hair but to coat over it, and (c) the conditioner get washed out of the hair. So, while some conditioners may help to detangle and make the hair look shiny, the result is mostly instantaneous and ephemeral. Retro-Chic conditioning potion, while has its cons, is still better than some other conditioners out there.
Ingredients: water, cetearyl alcohol, behentrimonium chloride, glycol stearate, caprylic capric triglyceride, polysorbate 60, PEG-150 stearate, steareth-20, amodimethicone, C11-15 pareth-17, laureth-9, glycerin, trideceth-12, hydroxyethylcellulose, cetrimonium chloride, ethylhexyl methoxycinamate, pehoxyethanol, methylparaben, ethylparaben, butylparaben, propylparaben, perfume, a-tocopherol succinate, Punica grantum extract, Rosmarinus officinalis, P.E rosa 4.5%, polyethylene glycol 400, soy lecithin

My rating: B+
Price: $16, you can buy it and other products from Retro-Chic here.

That's all for today, folks! If you've used Retro-Chic before, please let me know your experience. Either way, I'd love to hear from you!


Photobucket

P.S: If you like my blog, please subscribe to my feed. Thanks a lot!

LinkWithin

Related Posts with Thumbnails